How to Condition Flowers Before Arranging Them (And Why It Changes Everything)
Contents:
- What It Means to Condition Flowers Before Arranging
- Conditioning vs. Just Putting Flowers in Water
- What You Need (Nothing Fancy Required)
- Step-by-Step: How to Condition Flowers Before Arranging
- Step 1: Unpack and Sort Immediately
- Step 2: Recut the Stems
- Step 3: Strip the Lower Foliage
- Step 4: Fill Your Bucket with Treated Water
- Step 5: Let Them Rest
- Special Handling for Common Flower Types
- Roses
- Tulips
- Lilies
- Woody-Stemmed Flowers (Hydrangeas, Sunflowers)
- The Eco-Friendly Angle: Conditioning Reduces Waste
- Common Mistakes That Shorten Flower Life
- Frequently Asked Questions
- How long does it take to condition flowers before arranging?
- Can you condition flowers in a regular vase instead of a bucket?
- Do you need flower food to condition flowers?
- Should you condition flowers in warm or cold water?
- What happens if you skip conditioning?
- Your Next Bouquet Will Be Different
About 80% of cut flowers sold in the United States are imported, mostly from Colombia and Ecuador, and they’ve typically spent 24–72 hours in transit before they reach a grocery store or florist. By the time you bring them home, your flowers are thirsty, stressed, and running on fumes. Skipping the conditioning step is like asking someone to run a race the second they step off a 10-hour flight.
Conditioning — sometimes called “hardening” — is the process of rehydrating and preparing cut flowers so they’re ready to drink water efficiently and stand up in an arrangement. It’s the single highest-impact thing you can do for fresh flowers, and you don’t need a studio, a walk-in cooler, or a lot of counter space to do it well.
What It Means to Condition Flowers Before Arranging
Conditioning is not the same as simply putting flowers in a vase. It’s a deliberate, timed preparation step done before you arrange. During shipping and display, cut stem ends dry out and form an air bubble at the base — that bubble acts like a cork, blocking water uptake. Conditioning breaks that seal and restores the flower’s ability to hydrate properly.
Think of it as the difference between handing someone a glass of water and actually helping them drink it. The flower needs the right tools to absorb — a fresh cut, clean water, the right temperature, and time.
Conditioning vs. Just Putting Flowers in Water
A lot of people fill a vase, drop the stems in, and call it a day. That’s not conditioning — that’s hoping for the best. True conditioning involves a specific sequence: recutting the stems, stripping foliage, using a clean vessel with treated water, and giving flowers uninterrupted rest time away from heat and sunlight. Flowers that are properly conditioned before arranging typically last 3–5 days longer than those that aren’t. For a $15 grocery store bouquet, that’s real value.
What You Need (Nothing Fancy Required)
You don’t need a flower shop’s worth of equipment. For a small apartment setup, here’s what actually matters:
- A tall bucket or pitcher — at least 8 inches deep so stems have full support. A clean pasta pot or a large reusable water bottle works fine.
- Sharp scissors or floral snips — dull blades crush stem cells instead of cutting cleanly, which limits water uptake. A sharp kitchen knife also works.
- Room-temperature water — cold water is too slow for most flowers; very hot water is only used for specific woody stems. Aim for 100–110°F for most cut flowers.
- Flower food packets — those little sachets that come with bouquets contain sugar (fuel), an acidifier (to help water travel up the stem), and a biocide (to limit bacteria). Use them. If you don’t have one, a DIY mix of 1 tablespoon sugar, 1 tablespoon white vinegar, and a few drops of bleach per quart of water is a solid substitute.
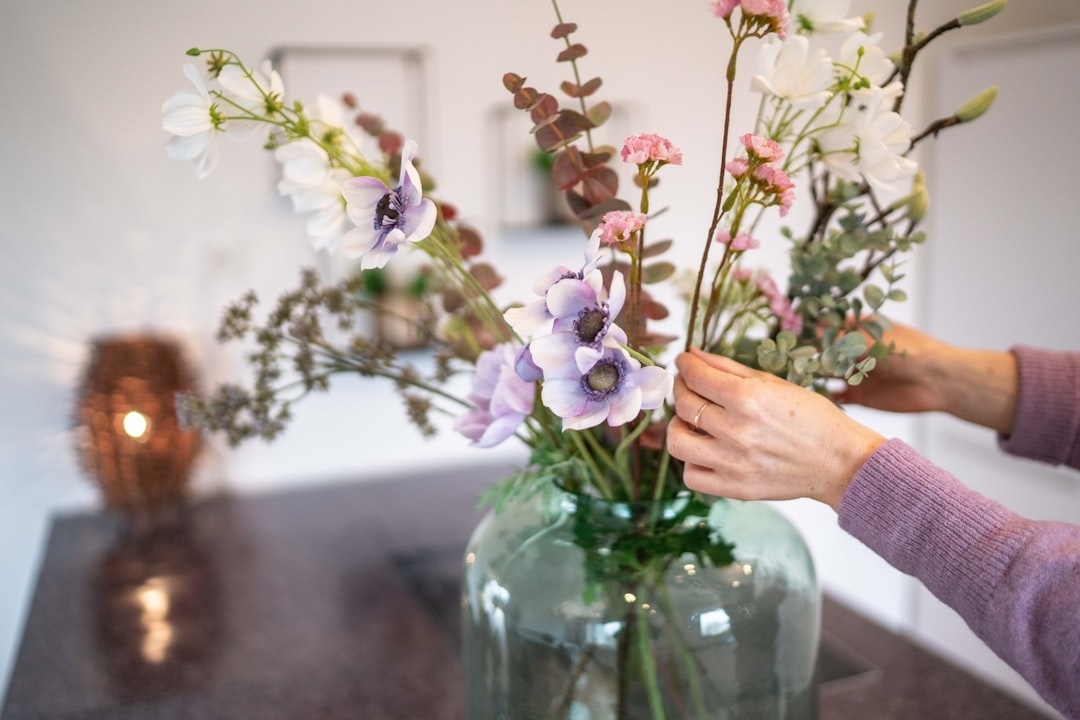
Step-by-Step: How to Condition Flowers Before Arranging
Step 1: Unpack and Sort Immediately
Don’t leave flowers sitting in plastic wrap or a paper sleeve. As soon as you get home, unwrap them gently and sort by stem type. Woody stems (like roses and sunflowers) need slightly different treatment than soft-stemmed flowers (like tulips or ranunculus). Remove any rubber bands carefully — they bruise stems.
Step 2: Recut the Stems
Using sharp scissors or a knife, cut about 1–2 inches off the bottom of each stem at a 45-degree angle. The angle matters: it increases the surface area for water absorption and prevents the stem from sitting flat on the bottom of the bucket, which would seal it off. Do this cut under running water or while the stem is submerged in a bowl of water — exposure to air in those first few seconds can reintroduce the air bubble you just removed.
Step 3: Strip the Lower Foliage
Remove every leaf, bud, and stem that would fall below the waterline. Submerged foliage rots fast and dramatically increases bacterial growth in the water, which is the number one killer of cut flowers. For a bucket with 6 inches of water, strip the bottom 6–7 inches of each stem. For roses, also remove any guard petals — those are the outermost petals that are sometimes brown or slightly damaged to protect the bloom during transit.
Step 4: Fill Your Bucket with Treated Water
Mix your flower food into room-temperature water following the packet’s ratio (usually one packet per quart). Pour it into your clean bucket — “clean” meaning free of soap residue, since even trace amounts of dish soap can harm flowers. Fill to about half the bucket’s depth.
Step 5: Let Them Rest
Place your bucket of flowers in the coolest, darkest spot in your apartment — a bathroom away from a window, a closet, or a cool corner away from any heating vents. Leave them for a minimum of 4 hours, but overnight conditioning (8–12 hours) produces noticeably perkier, more upright blooms that are much easier to arrange. Flowers that have conditioned properly will hold their stems stiff and their heads high. Wilted, floppy flowers going into an arrangement almost never fully recover.
Special Handling for Common Flower Types
Roses
Roses benefit from a warm water soak (around 110°F) during conditioning. If a rose head is drooping despite fresh water, submerge the entire stem and bloom in a sink of cool water for 20–30 minutes — this often revives them completely.
Tulips
Tulips keep growing after cutting and will bend toward light. Wrap them tightly in paper (like a newspaper cone) before placing in water to help them stand upright during conditioning. They prefer cold water, around 60–70°F.
Lilies
Remove the pollen-laden stamens from lilies right away — they stain everything, including petals. Wear gloves or be careful. Lilies condition well in room-temperature water with standard flower food.
Woody-Stemmed Flowers (Hydrangeas, Sunflowers)
For very woody stems, score or split the bottom inch of the stem vertically with a knife before placing in water. This opens more surface area for water uptake. Hydrangeas in particular can be tricky — if they wilt quickly, try submerging the whole bloom in water for 30 minutes.
The Eco-Friendly Angle: Conditioning Reduces Waste
Flowers that aren’t conditioned properly tend to die within 3–4 days. Properly conditioned flowers regularly last 7–12 days. That difference matters both financially and environmentally. The cut flower industry has a significant carbon footprint — most US flowers travel thousands of miles before they’re sold. Getting the maximum vase life out of every bunch means you’re buying less often and wasting fewer resources per arrangement.
You can also reuse conditioning water for outdoor plants (the diluted flower food is essentially mild fertilizer), and composting stripped foliage keeps it out of landfills. Small habits, but they add up.
Common Mistakes That Shorten Flower Life
- Using cold tap water — too cold slows water uptake significantly for most flowers (tulips are the exception).
- Leaving foliage below the waterline — this creates bacteria within hours.
- Conditioning near fruit — ripening fruit releases ethylene gas, which accelerates petal drop. Keep flowers away from your fruit bowl.
- Rushing straight into arranging — even 2 hours of rest is better than none, but less than 4 hours leaves most flowers under-hydrated.
- Using a dirty vase — bacteria from previous arrangements colonize vases quickly. Wash with hot soapy water and rinse thoroughly between uses.
Frequently Asked Questions
How long does it take to condition flowers before arranging?
Most cut flowers need at least 4–8 hours to condition properly. Overnight is ideal — 8 to 12 hours gives blooms time to fully rehydrate and “harden,” making them easier to work with and longer-lasting in the vase.
Can you condition flowers in a regular vase instead of a bucket?
A vase works, but a taller bucket is better because it supports more of the stem length in water, which improves uptake. If a vase is all you have, use the tallest one you own and fill it generously — at least 5–6 inches of water.
Do you need flower food to condition flowers?
Flower food speeds up and improves conditioning, but it’s not strictly required. Plain clean water with a fresh stem cut still conditions flowers adequately. A homemade substitute of 1 tablespoon sugar, 1 tablespoon white vinegar, and 2 drops of bleach per quart of water closely mimics commercial flower food.
Should you condition flowers in warm or cold water?
Room temperature to slightly warm water (100–110°F) works best for most cut flowers like roses, lilies, and hydrangeas. Tulips and spring bulb flowers are the exception — they prefer cool water around 60–70°F.
What happens if you skip conditioning?
Flowers that go straight from the store into a vase without conditioning typically last 3–5 days. Properly conditioned flowers regularly last 7–12 days. The main issue is that unconditioned stems often have blocked air pockets that prevent water uptake, leading to wilting even when the vase is full.
Your Next Bouquet Will Be Different
Once you build this habit — unwrap, recut, strip, fill, rest — it takes less than 10 minutes and transforms how every bouquet performs. Whether you’re picking up grocery store flowers on a Thursday or splurging on a farmers market bundle, the flowers you bring home deserve that prep time. Give them one good overnight rest, and they’ll reward you with a vase life you didn’t think was possible from a $12 bunch of alstroemeria.
Ready to take it further? Try your hand at single-variety arrangements next — one type of flower, properly conditioned, arranged simply in a clean vessel. It’s one of the most elegant and beginner-friendly ways to display blooms, and it makes the conditioning step even easier since you’re working with flowers that all have similar water and temperature needs.